| Index | Buttons | Fields | Message | Variables |
| Ask/Answer | Colour | Sound | Menus | QuickTime |
Using HyperCard
Stacks come in all shapes and sizes but there are common elements which users are accustomed to.

So arrow shaped buttons are normal for navigation back and forth through the cards of a stack, and fields are the normal containers for text.

Buttons often have icons that indicate the kind of activity they are associated with., so a button with a printer icon would be expected to print something
Menus

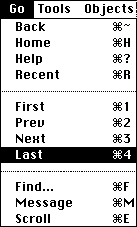
Along the top of the screen is the HyperCard menubar. Users can use the items in the each menu to do many things including navigation, making new cards, or fields or buttons, drawing or painting, printing, opening other stacks etc.

Keyboard Commands
To the right of each of the menu items in a menu are the keyboard commands for the same action. So to go to the final card in a stack you can type <Command 4> as above.
Just as buttons and fields can be made for specific purposes so can menus be added to the menubar.

Using Find
HyperCard has very impressive searching abilities. When the find command is invoked by typing <command F>, the message box appears with a flashing cursor appearing after the word find.

If HyperCard finds the string typed between the quote marks it stops searching and draws a rectangle around the located text

Levels in HyperCard

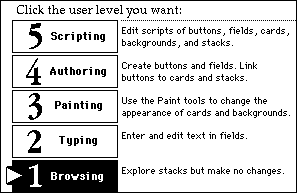
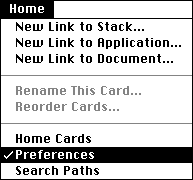
HyperCard allows for 5 different levels of use and the functions mentioned so far are all normally available at the lowest level, the Browsing level. You can set the user level by going to the home stack (type <command H>) and setting the level on the User Preference card

By setting the user level to 5 or Scripting you will have access to scripts and be able to make permanent changes to a stack.

You can also set the user level by typing <command M> to open the Message Box and then typing <set userlevel to 5>.
When the user level is set to 5 you can go on to the lessons that follow this introduction.
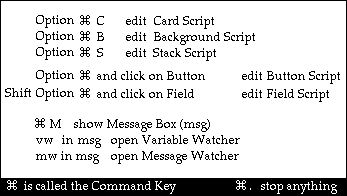
Before you go on to the lessons here are some useful shortcuts.
HyperCard Shortcuts
